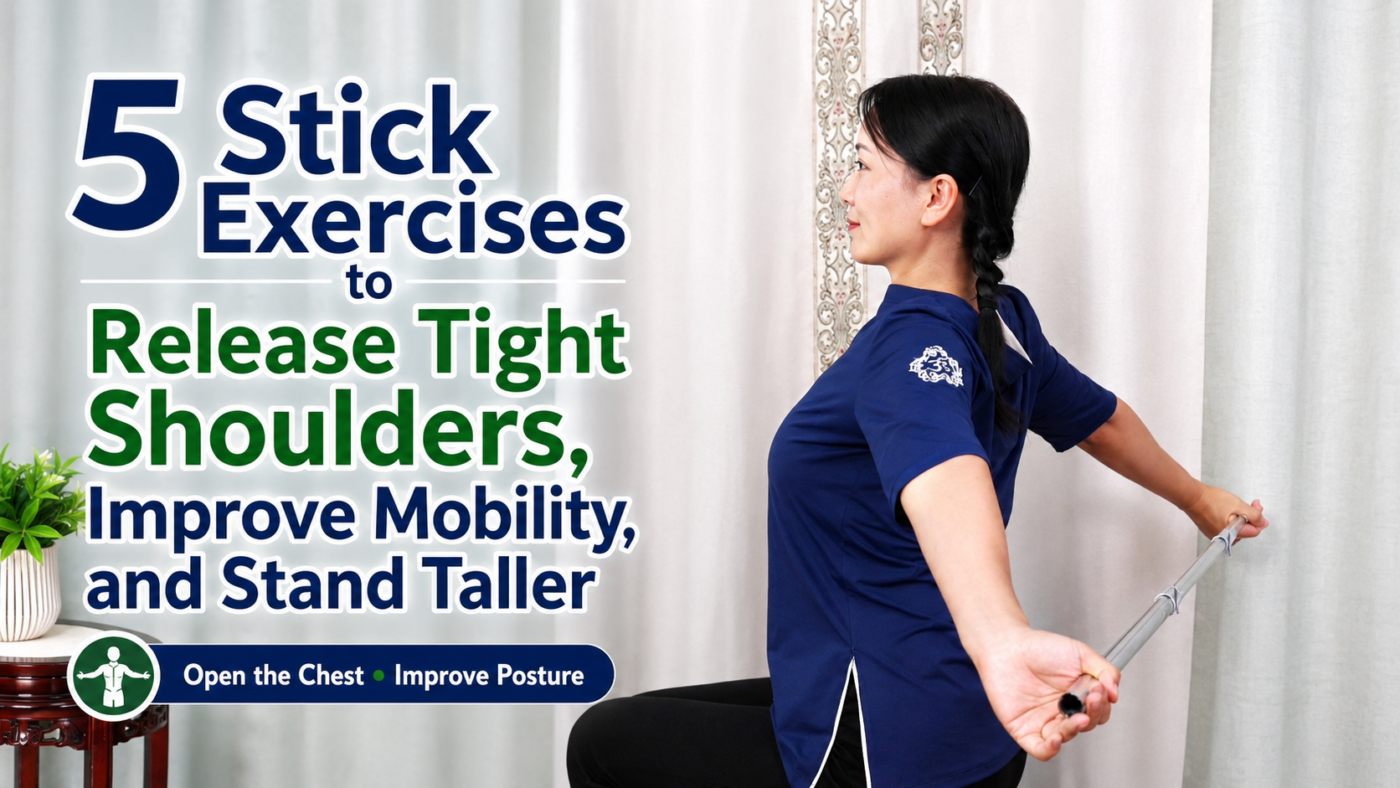
Stick exercises for shoulders are a simple way to improve shoulder mobility, ease upper-body stiffness, and support better posture without expensive equipment. With only a lightweight stick or broom handle, these five gentle movements can help your shoulders move more comfortably after long periods of sitting or desk work.After a long day of working, driving, sitting at a computer, or looking down at a phone, it is common to notice the same familiar pattern:
the shoulders feel tight,
the neck feels stiff,
the upper back feels heavy,
and the whole body seems to collapse slightly forward.
You may instinctively roll your shoulders or massage the back of your neck, but sometimes what your upper body really needs is movement through a larger, controlled range.
One of the simplest tools for doing that is something you may already have at home:
a long stick.
A broom handle, lightweight exercise dowel, long umbrella, or similar straight object can be used to guide the arms through several shoulder-mobility patterns.
You do not need heavy resistance.
The stick acts mainly as a guide.
Today I will show you five movements that can help mobilize the shoulders, encourage better upper-back movement, gently stretch the chest and arms, and make it easier to maintain a more upright posture.
You can perform them standing or sitting.
The most important rule is simple:
Never force your shoulders through sharp pain.
Mobility should gradually become more comfortable—not more painful.
Why the Shoulders Become So Stiff
The shoulder is designed for a remarkable amount of movement.
Your arms can reach:
forward,
overhead,
behind the body,
across the chest,
and through rotational movements.
But modern daily life rarely uses all of those ranges.
Instead, many of us spend hours with:
the arms in front of the body,
the elbows bent,
the shoulders slightly rounded,
and the head moving forward toward a screen.
Over time, that does not necessarily mean your joints are permanently “stuck.”
But some movements may become less familiar and less comfortable.
The chest may feel tight.
The upper back may feel rigid.
The shoulders may become reluctant to move overhead.
That is where gentle mobility work can help.
What You Need
Choose a stick that is:
lightweight,
smooth,
easy to grip,
and wider than your shoulders.
A broom handle or exercise dowel works well.
Avoid anything heavy, sharp, unstable, or likely to break.
The wider your grip, the easier many of these movements will feel.
As mobility improves, you may gradually narrow your hand position.
There is no need to rush.
Exercise 1: Straight-Arm Overhead Raise
This first movement is the simplest and works well as a warm-up.
It helps you assess how comfortably your shoulders can move overhead.
Starting Position
Sit upright on a stable chair or stand with your feet approximately shoulder-width apart.
Hold the stick with both hands using a wide grip.
Keep your elbows comfortably straight.
The stick begins in front of your thighs.
Relax the shoulders.
Keep your rib cage controlled.
The Movement
Slowly raise the stick forward.
Continue lifting until the arms move overhead.
Pause briefly.
Then lower the stick slowly back to the starting position.
Repeat.
The movement should feel smooth rather than forced.
What You May Feel
You may notice stretching around:
the sides of the chest,
the armpits,
the shoulders,
and the upper back.
That is fine if it remains comfortable.
What If You Cannot Reach Overhead?
Do not force it.
Raise the stick only to the highest pain-free position you can comfortably reach.
That may be:
eye level,
forehead level,
or beside the ears.
Your current range is your starting point.
Suggested Repetitions
10–20 repetitions
performed slowly.
Exercise 2: Overhead Side-to-Side Shoulder Shift
The second movement introduces a controlled side-to-side pattern.
It can create a stretch through the shoulders, upper trunk, and side body.
Starting Position
Raise the stick overhead with a wide grip.
Keep both elbows as straight as comfortably possible.
Keep the chest facing forward.
The Movement
Gently pull one side of the stick downward.
The opposite arm remains extended.
Move only as far as the shoulder allows.
Return to the center.
Then move toward the opposite side.
Alternate smoothly.
Imagine guiding the stick from side to side rather than forcing it.
Keep the Torso Quiet
One important point:
do not turn this into a large side bend.
The primary movement should come from the shoulders and arms.
A small natural trunk response is acceptable, but avoid twisting dramatically or collapsing sideways.
What You May Feel
This movement may stretch:
the side of the shoulder,
the latissimus dorsi,
the upper arm,
and the lateral trunk.
Many people who spend most of the day sitting are surprised by how tight this area feels.
Suggested Repetitions
One movement to each side counts as one cycle.
Perform:
10–12 cycles.
Exercise 3: Controlled Behind-the-Head Pulldown
This movement requires more shoulder mobility and should be treated as optional.
The goal is to practice scapular control and gently open the upper body—not to force the stick deeply behind the neck.
Starting Position
Hold the stick with a very wide grip.
Raise it overhead.
If comfortable, bring it slightly behind the crown of the head.
Keep the neck relaxed.
The Movement
Gently bend the elbows and lower the stick toward the upper-back area.
As you lower:
allow the shoulder blades to move downward and slightly toward one another.
Then slowly return the stick upward.
Keep breathing.
Important Safety Modification
Do not force the stick behind the neck if that position causes:
shoulder pinching,
sharp pain,
numbness,
neck discomfort,
or significant restriction.
A safer alternative is to lower the stick in front of the body toward the upper chest, similar to a wide-grip pulldown.
You can still practice shoulder-blade movement without placing the shoulders into a difficult behind-the-neck position.
For many people—especially those with shoulder injuries or limited external rotation—the front version is preferable.
What This Movement Can Train
Performed comfortably, it may help you practice:
scapular retraction,
shoulder depression,
upper-back awareness,
and coordinated arm movement.
It should not be described as “breaking up adhesions.”
True scar tissue, capsular restriction, tendon injuries, and frozen shoulder are medical and rehabilitation issues—not something that should be aggressively pulled apart with a stick.
Suggested Repetitions
Begin with:
5–10 repetitions.
Only progress toward 10–20 if the movement remains completely comfortable.
Exercise 4: Stick Shoulder Circles
This is the most dynamic movement in the routine.
It guides the shoulders through a large circular pattern.
Starting Position
Hold the stick wider than shoulder width.
Keep your arms as straight as comfortably possible.
Raise the stick upward.
The Movement
Guide the stick overhead.
Continue gradually toward the back of the body if your shoulders permit.
Then bring it forward again.
You can perform smooth circular or figure-eight-style patterns.
Move in both directions.
The motion should feel like the shoulders are exploring space—not fighting against resistance.
Use a Wider Grip
If the stick cannot travel backward comfortably, widen your hands.
A very wide grip dramatically reduces the shoulder range required.
Never narrow the grip simply to make the movement look more advanced.
Do Not Let the Entire Body Rotate
This movement should primarily come from the shoulder joints and shoulder blades.
Avoid:
twisting the torso,
arching the lower back aggressively,
or moving the head forward and backward to make room for the stick.
Your body should remain relatively steady.
Can This Correct Forward Head Posture?
Not by itself.
Shoulder mobility can contribute to more comfortable upright posture, but forward-head posture is influenced by multiple factors, including:
habit,
thoracic mobility,
neck muscle endurance,
workstation position,
vision,
and overall movement patterns.
The exercise can be one useful component of a broader posture routine.
Suggested Repetitions
Perform:
5–10 slow circles in each direction.
You do not need 20 if your shoulders fatigue.
Exercise 5: Vertical Behind-the-Back Shoulder Stretch
The fifth movement is a static mobility exercise.
It can help people gradually practice reaching one arm overhead while the other reaches behind the back.
This resembles the arm position required for activities such as:
reaching behind the head,
putting on clothing,
fastening garments,
or reaching the middle of the back.
Starting Position
Place the stick vertically behind your back.
One hand reaches over the shoulder and holds the upper end.
The opposite hand reaches behind the lower back and holds the lower end.
Keep the stick roughly aligned with the center of your back.
The Stretch
Use the upper hand to gently pull the stick upward.
The lower hand follows.
You may feel a stretch around the lower shoulder and upper arm.
Hold comfortably.
Then reverse the direction slightly if appropriate.
Do not yank the stick.
After completing one side, change arm positions.
Hold for 15–20 Seconds
Breathe slowly.
The stretch should feel noticeable but manageable.
Do not force the hands to move closer together.
Mobility often improves gradually.
Suggested Dose
Hold:
15–20 seconds
on each side.
Repeat:
2–3 rounds.
A Simple 10-Minute Shoulder Routine
You do not need to perform every movement at maximum volume.
A practical sequence might be:
1. Overhead Raises
10 slow repetitions.
2. Side-to-Side Shifts
8–10 cycles.
3. Front or Comfortable Behind-Head Pulldowns
8–10 repetitions.
4. Shoulder Circles
5 each direction.
5. Behind-the-Back Stretch
20 seconds each side.
Repeat the sequence once if your shoulders still feel comfortable.
The entire routine can take around 8–12 minutes.
Why the Stick Helps
You could perform many of these movements without equipment.
So why use the stick?
Because it connects the hands.
That creates a useful relationship between the two arms.
One arm can gently guide the other.
The stick also gives you immediate feedback about:
symmetry,
range of motion,
grip width,
and control.
For people who struggle to understand where their arms should move, a dowel can make mobility drills easier to learn.
Will These Exercises Fix Rounded Shoulders?
They may help, but posture is not controlled by one stretch.
Rounded shoulders can be influenced by:
daily sitting habits,
thoracic posture,
shoulder mobility,
chest tightness,
upper-back strength,
breathing patterns,
and the way you use computers and phones.
Therefore, the best approach usually combines:
mobility,
strengthening,
movement breaks,
and better work-position habits.
Stick mobility drills can help open movement options.
Upper-back strengthening helps you use those options.
Both matter.
What About the “Dowager’s Hump”?
A visible prominence around the lower neck or upper back can have different causes.
Sometimes it is related to posture and soft-tissue appearance.
Sometimes spinal curvature, vertebral changes, body composition, or other structural factors contribute.
Therefore, it is inaccurate to promise that shoulder-stick exercises will “remove” a hump at the base of the neck.
They may help some people feel less stiff around the upper back and shoulders.
But a new, pronounced, painful, or worsening spinal prominence deserves proper assessment.
Shoulder Pain Is Not a Sign That the Exercise Is Working
This point is critical.
If a shoulder movement is difficult, that tells you that your available range may currently be limited.
It does not mean you should force through pain.
A mild stretching sensation can be acceptable.
Sharp pain is not.
Stop or reduce the range if you experience:
pinching,
deep joint pain,
burning pain,
numbness,
tingling,
weakness,
or pain that persists after the exercise.
Mobility improves through repeated tolerable exposure.
Not through punishment.
If One Shoulder Is Much Tighter
This is common.
The dominant arm may have a different range from the other side.
Previous injuries can also create asymmetry.
Do not force both arms to look identical during the first session.
Instead:
use a wider grip,
slow down,
and allow the tighter side to work within its own range.
Track progress over weeks rather than minutes.
A Four-Week Shoulder Mobility Progression
Week 1: Learn the Movements
Use a very wide grip.
Perform 5–10 repetitions.
Avoid any painful range.
Week 2: Improve Control
Move more slowly.
Pay attention to whether the ribs or lower back compensate.
Week 3: Expand the Range
If comfortable, allow the stick to travel slightly farther.
Do not narrow the grip unless the movement remains easy.
Week 4: Build a Regular Routine
Perform the sequence most days or several times per week.
Combine it with upper-back strengthening and regular breaks from sitting.
The goal is not extreme flexibility.
The goal is comfortable function.
If You Work at a Computer All Day
You do not need to wait until your shoulders feel terrible.
Movement breaks can be more useful than trying to “undo” eight uninterrupted hours of sitting at the end of the day.
Every hour or two, consider:
standing up,
walking briefly,
rolling the shoulders,
reaching overhead,
and changing position.
Then use the stick routine as a more focused mobility session.
Your body usually responds better to frequent movement than to remaining motionless all day followed by one intense stretch.
Who Should Be More Careful?
Use caution if you have:
a recent shoulder injury,
rotator-cuff tear,
shoulder instability,
recent surgery,
advanced arthritis,
a history of shoulder dislocation,
severe frozen shoulder,
neck nerve symptoms,
or significant unexplained shoulder pain.
Do not assume that more stretching is always the answer.
Some shoulder conditions require strengthening, load management, or medical rehabilitation rather than aggressive mobility work.
The Bigger Lesson
You do not need expensive equipment to move your shoulders.
Sometimes a simple stick is enough to reveal how much movement you have stopped using.
The first exercise helps you reach overhead.
The second explores side-to-side shoulder motion.
The third trains shoulder-blade control.
The fourth moves the shoulders through larger circles.
The fifth practices reaching behind the back.
Together, they provide the shoulders with something modern life often lacks:
variety.
If you sit at a desk all day, your body does not necessarily need punishment afterward.
It needs movement.
Slow movement.
Regular movement.
Comfortable movement.
A little each day can be far more useful than forcing a dramatic stretch once a month.
The goal is not to make your shoulders infinitely flexible.
The goal is simpler:
to reach,
rotate,
lift,
dress,
work,
and move through daily life with less restriction.
Frequently Asked Questions
What kind of stick should I use?
A lightweight exercise dowel, broom handle, or similar smooth object works well. It should be long enough for a wide grip and light enough that you do not have to strain.
Can beginners do these exercises?
Yes, but beginners should use a wide grip and smaller range. The behind-the-head and large-circle movements may need to be modified.
Can I perform the routine sitting?
Yes. Most movements can be done sitting upright on a stable chair.
How often can I practice?
Gentle shoulder mobility can often be practiced several times per week or even daily if it remains comfortable. More intense stretching may require additional recovery.
Should I stretch through shoulder pain?
No. Reduce the range or stop. Sharp or persistent pain is not a normal mobility goal.
Can this routine fix rounded shoulders?
It may improve shoulder and upper-back mobility, but posture usually requires a combination of mobility, strengthening, daily movement, and workstation changes.
Can these exercises cure frozen shoulder?
No. Frozen shoulder can involve substantial capsular restriction and may require individualized rehabilitation and medical assessment.
Why is one arm harder to move behind my back?
Shoulder mobility often differs between sides because of dominance, previous injury, anatomy, or movement habits. Do not force the tighter side.
Do I have to bring the stick behind my neck?
No. If that position feels uncomfortable, keep the stick in front of the head and perform a front pulldown instead.
How long does shoulder mobility take to improve?
It varies. Some people feel temporarily freer after one session, while meaningful long-term changes usually require regular practice over weeks.
Medical Disclaimer
This article is for educational purposes only and is not medical advice. Shoulder mobility exercises should remain within a comfortable, controlled range.
Stop if you experience sharp pain, instability, numbness, tingling, weakness, dizziness, or worsening symptoms.
People with recent shoulder or neck injuries, surgery, rotator-cuff problems, dislocations, severe arthritis, neurological symptoms, or persistent unexplained pain should consult an appropriately qualified healthcare professional before performing unfamiliar shoulder exercises.
This article is for general education and does not replace individualized care from a qualified health professional. Seek appropriate advice for persistent, severe, or concerning symptoms.
Read the full medical disclaimer