For many people, something seems to change after 40.
Work becomes busier.
There is less time for exercise.
Hours of the day are spent sitting at a desk, driving, or taking care of other responsibilities.
Meanwhile, the waistline may gradually expand, the abdominal muscles feel weaker, the hips become stiffer, and exercises that once seemed easy may suddenly feel much more demanding.
It is often blamed entirely on a “slower metabolism.”
The reality is more complicated.
Aging can influence body composition, muscle mass, hormonal function, activity levels, and energy expenditure, but lifestyle changes also matter enormously. People often move less, spend more time sitting, and gradually lose muscle if they do not deliberately challenge it.
The good news is that exercise does not always require getting onto the floor, running, jumping, or performing deep squats.
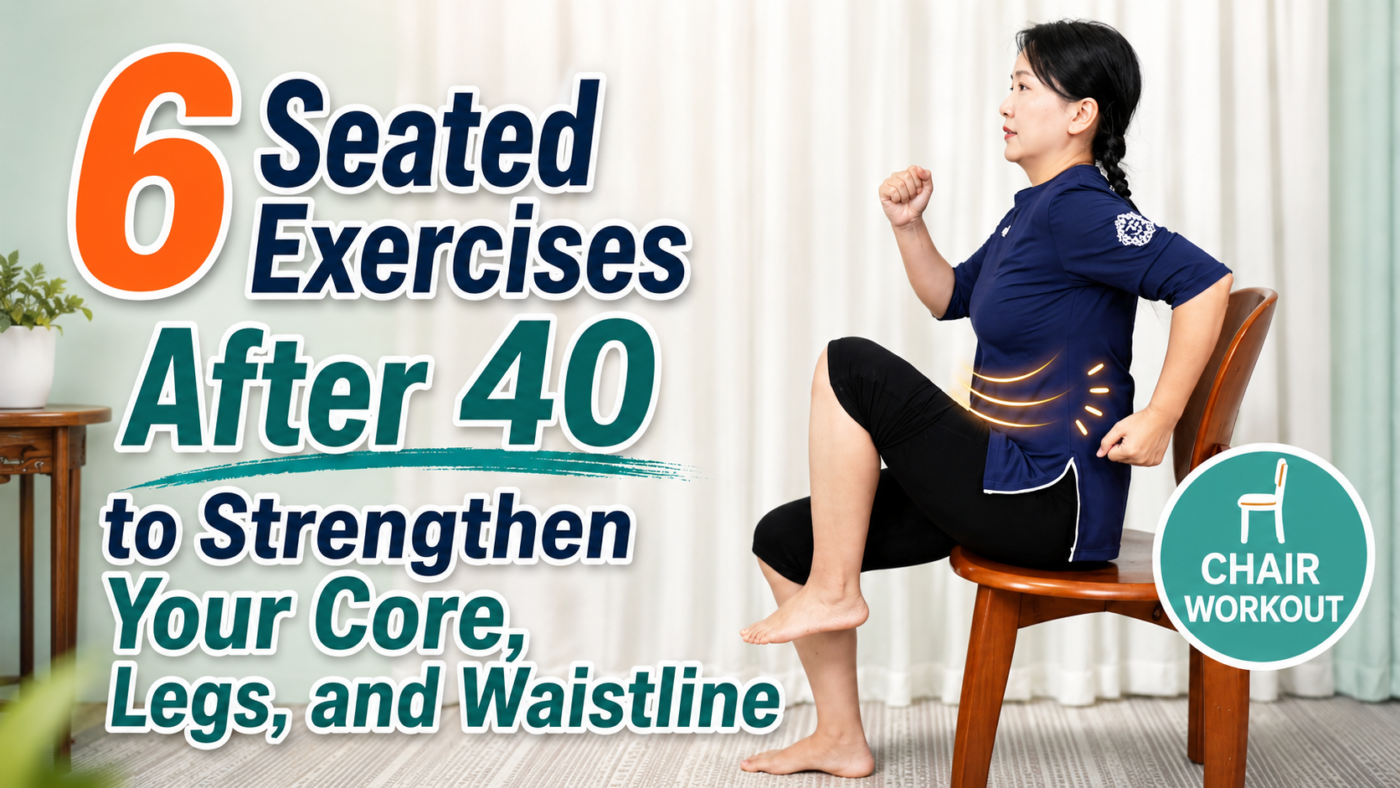
A sturdy chair can become a surprisingly useful training tool.
The following six seated exercises combine:
core activation,
hip flexion,
leg strengthening,
trunk rotation,
shoulder movement,
coordination,
and flexibility.
The complete routine can be performed in approximately 15–20 minutes.
And because most of the movements are performed sitting down, they may be more approachable for beginners, adults with higher body weight, people who dislike floor workouts, and some people who find fully weight-bearing exercise uncomfortable.
Chair-based exercise is not merely a “second-best” form of movement. A systematic review and meta-analysis involving adults aged 50 and older found that chair-based exercise programs can improve both upper- and lower-extremity physical function.
The key is knowing what these exercises can realistically do.
They can strengthen your abdomen.
They can challenge your legs.
They can increase daily movement.
They can improve muscular endurance and coordination.
But they cannot guarantee that fat will disappear specifically from your belly.
That distinction is important.
Can Seated Ab Exercises Really Reduce Belly Fat?
You will probably feel your abdomen working during this routine.
You may also feel warmth or muscular fatigue around the lower abdomen and sides of the waist.
That means the muscles are working.
It does not automatically mean abdominal fat is being burned directly from the exact place that feels warm.
The idea of “spot reduction”—losing fat specifically from the body part being exercised—has been debated for decades.
One randomized study found that six weeks of abdominal exercises significantly improved abdominal muscular endurance but did not significantly reduce abdominal fat, waist circumference, or overall body fat.
More recently, a small 2023 randomized trial in overweight men found greater trunk-fat reduction when substantial abdominal endurance exercise was added to aerobic training, suggesting that some localized effect may be possible under specific training conditions. However, the sample was small and the intervention involved considerably more exercise than a short chair routine.
The practical conclusion is simple:
Train your abdomen to make it stronger.
Use exercise and nutrition together when fat loss is the goal.
Do not assume that abdominal burning equals abdominal fat melting.
Exercise overall can reduce both abdominal visceral and subcutaneous fat, particularly when sufficient activity is performed consistently. A 2025 meta-analysis of randomized trials in adults with overweight or obesity found significant reductions in both visceral and subcutaneous abdominal fat with prolonged exercise programs.
This chair routine can contribute to that bigger picture.
Before You Start: Choose the Right Chair
Use a strong, stable chair without wheels.
Avoid a lightweight folding chair that could slide or tip.
Place it on a nonslip surface.
For most exercises, sit toward the front half of the seat rather than leaning heavily against the backrest.
Keep your feet within easy reach of the floor.
If you have significant balance problems, severe back or hip pain, recent surgery, uncontrolled cardiovascular disease, or another condition that limits exercise, ask an appropriate healthcare professional whether these movements are suitable for you.
You should feel muscular effort.
You should not feel sharp joint pain.
Exercise 1: Seated Cross-Body Knee-to-Elbow
This first exercise combines a knee lift with trunk rotation.
It challenges the abdominal muscles, hip flexors, obliques, and coordination between the upper and lower body.
Starting Position
Sit toward the front of the chair.
Place both feet on the floor.
Lengthen the spine without becoming rigid.
Keep your chest comfortably lifted.
Gently brace the abdomen as if preparing for someone to lightly press against your stomach.
You do not need to suck the belly inward as hard as possible.
Place your hands lightly behind your head.
Open the elbows to the sides.
Do not pull on your neck.
The Movement
Lift your left knee toward your torso.
At the same time, gently rotate your upper body toward the left.
Bring your right elbow toward the left knee.
They do not need to touch.
Return to the center.
Place the left foot down.
Now lift the right knee.
Rotate your torso toward the right and bring the left elbow toward the right knee.
Return.
Continue alternating.
Right elbow to left knee.
Left elbow to right knee.
Move slowly enough that you remain in control.
Do Not Collapse Forward Just to Make Contact
The purpose is not to win a contest to touch your knee.
If your knee does not rise high enough to meet the elbow, that is fine.
Bring the elbow toward the thigh instead.
Avoid aggressively rounding the back just to force the elbow and knee together.
The movement should come from a combination of:
hip flexion,
abdominal engagement,
and controlled trunk rotation.
What You May Feel
When the knee rises, the hip flexors and abdominal region work to control the leg and pelvis.
When the trunk rotates, your oblique abdominal muscles contribute.
You may notice fatigue along the side of the waist and lower abdomen.
That is normal muscular effort.
Beginner Dose
10 alternating repetitions per side.
Progression
Work toward 20–30 alternating repetitions.
Perform 2–3 sets if comfortable.
Rest for 30–60 seconds between sets.
Exercise 2: Seated Running March
The second movement resembles running while seated.
It combines alternating knee lifts with opposite-arm swings.
The movement looks simple, but once the arms and legs begin moving together, it becomes an effective coordination drill.
Starting Position
Sit tall near the front of the chair.
Brace your abdomen gently.
Bend your elbows approximately as you would while jogging.
Relax your shoulders.
Begin Marching
Raise the left knee.
As it rises:
bring the right arm forward,
and move the left arm backward.
Lower the left leg.
Raise the right knee.
At the same time:
bring the left arm forward,
and move the right arm backward.
Continue alternating.
Think:
opposite arm, opposite leg.
That is the natural coordination pattern used during walking and running.
Make the Movement Deliberate
You do not need to move quickly.
A controlled range is more useful than frantic speed.
Lift each knee as high as you comfortably can without leaning dramatically backward.
Swing the arms naturally from the shoulders.
Keep breathing.
If raising the knee high produces hip pinching or lower-back discomfort, reduce the height.
Why This Exercise Is Useful
This movement involves more than the abdominal muscles.
It incorporates:
hip flexors,
core stabilizers,
shoulders,
arms,
postural muscles,
and neurological coordination.
It also raises the amount of movement you are performing compared with remaining completely sedentary.
WHO emphasizes that reducing sedentary time and accumulating physical activity throughout the day is beneficial for health.
Beginner Dose
20 alternating marches.
Progression
Work toward 30 cycles per set, for up to 3 sets.
Exercise 3: Seated Knee Lift With Swimming Arms
Now we add a larger shoulder movement.
This exercise combines alternating knee lifts with sweeping arm motions inspired by freestyle swimming.
Starting Position
Sit tall.
Keep the abdomen gently engaged.
Extend both arms forward at approximately shoulder height.
Keep a soft bend in the elbows.
The Movement
Raise your left knee.
At approximately the same time, sweep the opposite arm through a comfortable swimming-style motion.
Lower the leg and transition to the opposite side.
Raise the right knee.
Alternate the arm pattern.
Continue smoothly from side to side.
You are not attempting to reproduce perfect competitive swimming technique.
The objective is simply to combine:
large shoulder movement,
rhythmic arm coordination,
and alternating hip flexion.
Keep the Movement Comfortable
Do not force a huge arm circle if you have limited shoulder mobility.
A smaller arc is perfectly acceptable.
Your shoulders should not pinch.
Your lower back should not repeatedly arch to create artificial range.
Keep the rib cage reasonably controlled.
Suggested Dose
Begin with 10–12 repetitions per side.
Progress toward approximately 20 alternating cycles.
Perform up to 2–3 sets.
Exercise 4: Seated Hamstring Forward Fold
After the first three dynamic exercises, slow things down.
The seated forward fold primarily targets the muscles along the back of the thighs and may also create a stretch through the calves and back.
Starting Position
Sit securely toward the front of the chair.
Extend one or both legs forward, depending on your flexibility and balance.
Rest the heels on the floor.
Point the toes upward gently.
Lengthen the spine.
Place your hands on your thighs.
Hinge Forward
Take a comfortable breath in.
As you exhale, begin leaning forward from the hips.
Allow your hands to slide along the thighs toward the knees, shins, or ankles.
You do not need to touch your toes.
Stop when you feel a comfortable stretching sensation along the backs of the thighs.
Remain there for several relaxed breaths.
Then slowly return upright.
Your Knees Do Not Have to Be Perfectly Straight
The original routine instructs people to lock the knees straight.
That is unnecessary.
If keeping your legs completely straight causes excessive pulling behind the knees, nerve-like symptoms, or difficulty maintaining a comfortable spine, allow a small bend in the knees.
The purpose is to stretch the hamstrings comfortably.
It is not to demonstrate flexibility.
Avoid Aggressive Rounding
Think about bringing the chest forward rather than trying to force your forehead toward your knees.
A gentle spinal curve may naturally occur, but do not pull yourself downward aggressively.
Stay within a tolerable range.
Suggested Dose
Hold for 3–5 relaxed breaths.
Repeat 3–5 times.
One or two rounds are enough.
Exercise 5: Double-Knee Lift With Forward Press
This movement increases the core challenge by asking both legs to become lighter—or potentially leave the floor—while the arms press forward.
It is substantially harder than the previous exercises.
Starting Position
Sit near the front-middle of a stable chair.
Make sure the chair cannot tip.
Sit tall.
Bring both hands into loose fists near the chest.
Keep the shoulders relaxed.
Lift the Knees
Brace your abdomen.
Lift one or both feet slightly from the floor.
If you are able, draw both knees gently toward the torso.
Hold the position briefly.
Then press both arms forward.
Return the fists toward your chest.
Lower your feet when necessary.
Important Modification
You do not need to keep both legs suspended if doing so causes your lower back to strain.
Beginners can:
lift one leg at a time,
keep the toes lightly touching the floor,
or reduce the height of the knee lift.
The abdominal muscles should work, but the movement should not produce sharp back or hip pain.
What This Exercise Actually Trains
Double-knee lifting strongly involves the hip flexors in addition to the abdominal muscles.
This is worth emphasizing because exercises involving leg raises are often described as purely “lower-ab exercises.”
Your hip flexors do substantial work.
The abdominals help stabilize the pelvis and trunk while the legs move.
Beginner Dose
5–10 controlled repetitions.
Progression
Work toward 15–20 repetitions.
If technique remains good, perform 2–3 sets.
There is no need to force 20 repetitions simply because they appear in a routine.
Exercise 6: Seated Double-Leg Extension
The final exercise combines hip flexion with knee extension and creates a strong challenge for the front of the thighs.
It can be demanding.
Starting Position
Sit securely on the chair.
Hold the sides of the seat lightly for stability.
Do not grip so hard that the arms do all the work.
Bring the feet together or keep them comfortably close.
Begin with the knees bent.
The Movement
Brace your torso.
Lift both feet slightly.
Gradually extend the knees forward.
The legs may approach parallel with the floor, but they do not need to become perfectly horizontal.
Pause briefly.
Bend the knees again.
Lower the feet.
Repeat.
Do Not Force the Legs Completely Straight
Some people cannot comfortably extend both knees to horizontal while keeping the torso controlled.
That is normal.
Use a smaller range.
You can also perform one leg at a time, which is considerably easier.
The major muscles working include the quadriceps at the front of the thighs, along with the hip flexors and trunk stabilizers.
Is This Exercise “Zero Load” on the Knees?
No.
It is more accurate to say that the exercise reduces weight-bearing demand compared with standing squats, lunges, running, or jumping.
Your knees are still moving.
Your quadriceps are still pulling through the knee-extensor mechanism.
That is not necessarily harmful—it is simply not “zero load.”
For many people, controlled seated knee extension is a useful strengthening pattern.
People with symptomatic knee conditions should use a comfortable range and individualized advice when necessary.
Beginner Dose
8–10 repetitions.
Progression
Work toward approximately 15 repetitions for 2 sets.
The Complete 15–20 Minute Chair Routine
You can perform the exercises in this order:
1. Cross-Body Knee-to-Elbow
10–30 alternating repetitions
2. Seated Running March
20–30 alternating repetitions
3. Knee Lift With Swimming Arms
10–20 repetitions per side
4. Seated Hamstring Forward Fold
3–5 repetitions, holding several breaths
5. Double-Knee Lift With Forward Press
5–20 repetitions
6. Double-Leg Extension
8–15 repetitions
Rest 30–60 seconds between exercises or whenever your technique begins to deteriorate.
A beginner does not need to complete every prescribed repetition.
The first goal is to finish feeling exercised—not defeated.
A Better Four-Week Progression
Instead of starting with the maximum volume immediately, allow your body to adapt.
Week 1: Learn the Movements
Perform one set of each exercise.
Keep the repetitions modest.
Focus on posture and breathing.
Week 2: Build Control
Increase repetitions slightly.
Try to reduce unnecessary leaning and momentum.
Week 3: Add Endurance
Perform two sets of selected exercises.
Maintain controlled movement.
Week 4: Build a Routine
Work toward the full 15–20 minute session if it remains comfortable.
You might perform the routine 3–5 days per week, depending on intensity, recovery, and the rest of your exercise program.
You do not necessarily need to perform every exercise every day.
What About People Over 40 or 50?
Chair exercise can be particularly useful as an entry point for adults who have become inactive.
It allows people to work on strength and coordination without immediately demanding deep squats, floor transfers, or high-impact exercise.
Research supports the broader concept.
A systematic review involving 25 studies and 1,388 participants found that chair-based exercise programs improved measures of both upper- and lower-body physical function in older adults.
That does not mean chair exercise should become the only form of physical activity.
WHO recommends that older adults combine aerobic activity with muscle strengthening and, where appropriate, multicomponent exercise that includes balance and functional strength.
Think of chair exercise as one tool.
Walking can be another.
Resistance training can be another.
Tai Chi, mobility work, swimming, cycling, or other activities can complement it.
Does Metabolism Really Collapse After Middle Age?
The phrase “your metabolism drops once you reach middle age” is too simplistic.
Body composition often changes during adulthood.
Many people lose muscle and gain fat over time.
Daily activity can decline substantially.
Hormonal changes, sleep, medications, diet, and health conditions may also influence body weight.
But reaching 40 does not suddenly switch the metabolism off.
One practical factor we can influence is muscle.
Maintaining and strengthening muscle increases physical capacity and helps preserve function as we age.
That is another reason the goal of this routine should not simply be “make the stomach smaller.”
A stronger abdomen and stronger thighs are useful even before the scale changes.
Why Your Abdomen May Feel Hot or Sore
Several exercises in this routine require the abdominal muscles to contract repeatedly.
That can produce:
muscular fatigue,
a mild burning sensation,
warmth,
and delayed soreness.
Those feelings can tell you that tissue is working.
They do not tell you how much fat has been lost.
Likewise, more pain is not more effective.
A strong muscular effort can be acceptable.
Sharp pain is a signal to stop.
If Belly Fat Is Your Main Goal
Use the chair routine—but do not make it your entire strategy.
Research consistently supports broader exercise programs for reducing abdominal fat. A meta-analysis of randomized trials found that aerobic training, resistance training, and combined training can all reduce abdominal subcutaneous fat.
A practical weekly strategy might therefore include:
chair exercises for strength and mobility,
regular walking or another aerobic activity,
resistance exercise for major muscle groups,
less prolonged sitting,
and nutrition that supports your energy and weight goals.
WHO recommends adults accumulate regular aerobic activity and perform muscle-strengthening activity involving major muscle groups at least twice per week.
The chair routine can help you start.
It does not need to do everything.
Who May Especially Like This Routine?
These exercises may be particularly attractive to:
people who work at a desk,
beginners returning to activity,
adults over 40,
older adults,
people with higher body weight,
people who dislike floor exercise,
and some people who find repeated standing exercise uncomfortable.
But “seated” does not automatically mean “safe for everyone.”
Anyone with severe hip, back, knee, cardiovascular, neurological, or balance problems may require modifications.
When to Stop
Stop the exercise if you develop:
sharp joint pain,
chest pain,
marked dizziness,
faintness,
unusual shortness of breath,
new numbness or tingling,
or severe back pain.
Mild muscular fatigue is one thing.
Concerning symptoms are another.
If you feel soreness the next day, allow yourself to recover rather than assuming you must exercise through it.
The Bigger Goal After 40
The most useful part of this routine is not the promise of a suddenly flat stomach.
It is accessibility.
You can sit down and begin.
No gym.
No treadmill.
No jumping.
No complicated equipment.
And no need to be fit before you start exercising.
The cross-body knee lift asks your trunk to rotate.
The seated march coordinates opposite arms and legs.
The swimming movement gets the shoulders involved.
The forward fold restores some movement to the back of the legs.
The knee lift challenges the trunk.
The leg extension strengthens the thighs.
One routine gives the body several different jobs.
That matters.
Because after 40, the goal should not simply be to occupy a smaller body.
The better goal is to build a body that remains useful.
Strong enough to get up.
Mobile enough to bend.
Stable enough to move confidently.
Fit enough to walk farther.
And resilient enough to keep participating in life.
If your waistline also changes as your activity level, nutrition, muscle mass, and overall fitness improve, that is an additional benefit.
But strength comes first.
Movement comes first.
Consistency comes first.
And a chair is enough to begin.
Frequently Asked Questions
Can seated exercises reduce belly fat?
They can increase activity and strengthen the muscles of the abdomen, hips, and legs. Exercise programs can contribute to reductions in abdominal fat, but a short seated abdominal routine cannot guarantee targeted belly-fat loss. Studies of spot reduction have produced mixed results.
Are seated exercises useful for people over 50?
Yes. Research suggests that structured chair-based exercise can improve physical function in older adults, particularly when performed consistently over time.
Are these exercises completely safe for bad knees?
They reduce weight-bearing compared with many standing exercises, but they are not completely load-free. Knee extension and leg lifting still involve muscles and structures around the knee. Use a pain-free range and seek individualized advice if you have significant knee disease.
Why does my lower abdomen burn during knee lifts?
Your hip flexors and abdominal muscles are working to move and stabilize your legs and pelvis. Muscular fatigue can create a burning sensation. It does not mean fat is being burned specifically from that location.
Do I have to touch my elbow to my knee?
No. Move the elbow and opposite knee toward one another without forcing them to touch.
Should my knees stay completely straight during the forward fold?
No. A slight bend is acceptable and may be preferable if straight knees create excessive tension or discomfort.
How often should I perform this routine?
A beginner might start two or three times per week and gradually increase frequency. If the routine is light and recovery is good, some exercises can be performed more often. Your overall exercise program and health status matter.
Can I perform the routine at work?
Several of the exercises can be performed during work breaks provided you have a stable chair and enough space.
Is 15 minutes enough?
Fifteen minutes of movement is far better than remaining inactive, but it should ideally contribute to a broader active lifestyle. WHO recommends regular aerobic activity and muscle-strengthening exercise throughout the week.
Medical Disclaimer
This article is provided for educational purposes only and does not constitute medical advice. Chair-based exercises should be performed using a stable chair and within a comfortable range of motion. Stop if you experience sharp pain, chest discomfort, faintness, marked dizziness, unusual shortness of breath, or neurological symptoms.
People with recent surgery, severe joint disease, significant cardiovascular disease, neurological conditions, substantial balance impairment, or persistent back, hip, or knee pain should consult an appropriately qualified healthcare professional before beginning an unfamiliar exercise program.
This article is for general education and does not replace individualized care from a qualified health professional. Seek appropriate advice for persistent, severe, or concerning symptoms.
Read the full medical disclaimer