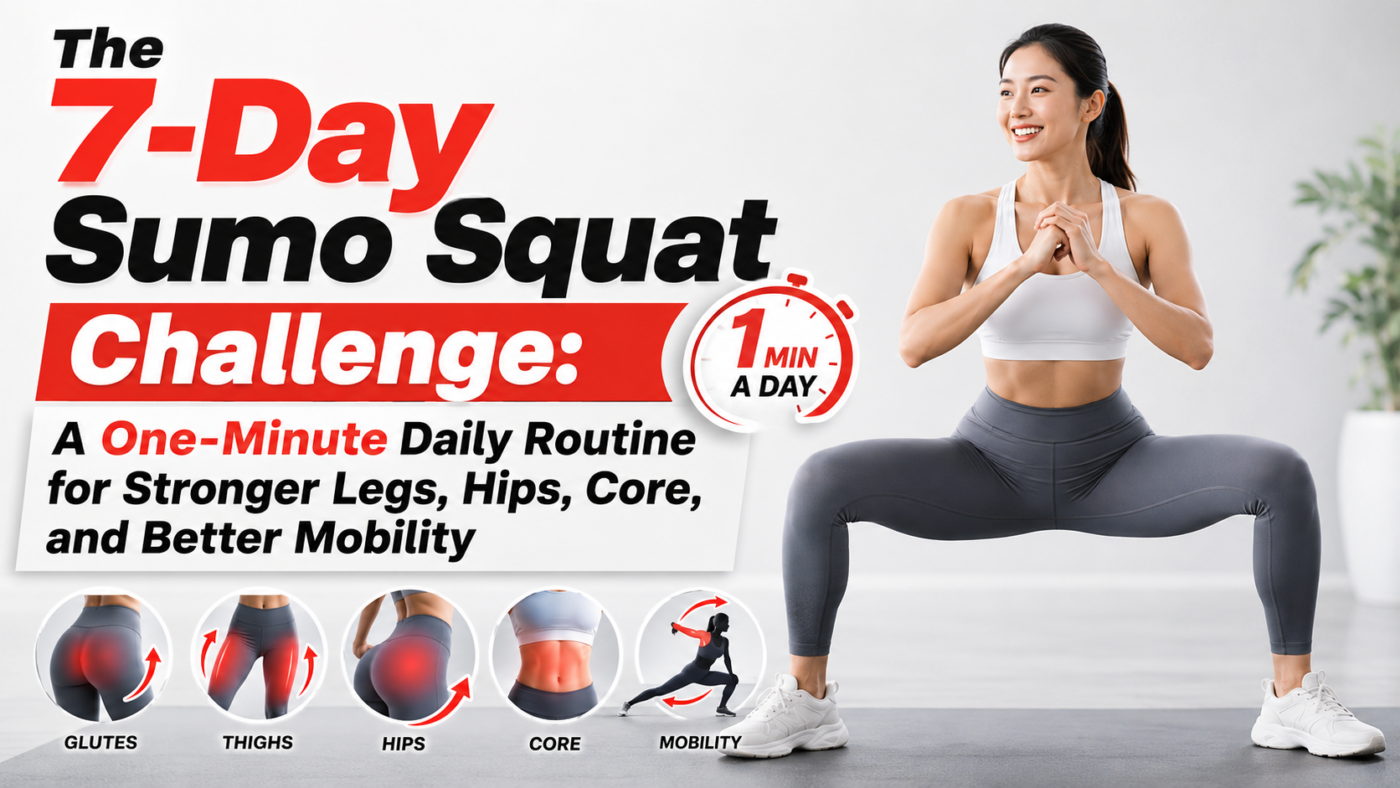
A single minute of movement may not “transform your body” overnight, but a short daily routine can still be surprisingly useful when it is simple enough to repeat.
One movement that works especially well for this purpose is the sumo squat, performed in a wide stance similar to the Japanese martial-arts position known as Shiko Dachi.
This stance appears in traditional Japanese disciplines such as karate and sumo. It places the body between standing and sitting, which means the hips, thighs, glutes, core, and stabilizing muscles all have to work together.
For people who spend much of the day sitting at a desk or standing in the same position, a short sumo-squat routine can provide a useful contrast to otherwise repetitive movement patterns.
The goal of this seven-day challenge is simple:
Practice for about one minute a day, improve your form, and gradually become stronger and more comfortable in the position.
What Is Shiko Dachi?
Shiko Dachi is a wide, low stance used in several Japanese martial traditions.
The feet are placed wider than shoulder width, the toes angle outward, and the knees bend in the same general direction as the toes.
Instead of sitting all the way down, you hold the body somewhere between standing and sitting.
That position immediately increases demand on several areas:
- Quadriceps
- Gluteal muscles
- Inner thighs
- Hip stabilizers
- Core muscles
- Calves
- Muscles around the pelvis
Because these muscles must work simultaneously, the stance can feel much harder than it looks.
Why This Position Feels Different From Normal Standing
Modern life involves a tremendous amount of repetitive positioning.
You sit.
You stand.
You walk forward.
But you rarely spend much time in a deep, wide stance with the hips externally rotated.
A sumo-squat position changes the demand on the lower body.
The hips open more widely, the adductors of the inner thighs are loaded differently, and the trunk has to stabilize while the knees and hips remain flexed.
This does not mean previously “sleeping muscles” suddenly switch on in a literal sense.
A better way to think about it is that the movement challenges muscles and movement patterns that may receive relatively little attention during ordinary daily activity.
Can Sumo Squats Improve Hip Mobility?
They can help train hip mobility when performed comfortably and with good technique.
A wide squat requires motion at the hips, knees, and ankles while asking the pelvis and trunk to remain controlled.
Over time, practicing this movement may make the position feel less stiff and improve tolerance for a wider range of hip motion.
However, mobility should not be forced.
If you feel sharp pain, pinching deep in the hip, or pain in the knees, reduce the depth or stop.
The goal is controlled movement, not maximum depth.
What About Blood Flow and “Lymphatic Flow”?
Movement generally increases circulation to active muscles.
Repeated contractions of the leg muscles can also assist normal venous and lymphatic return.
That makes regular movement beneficial compared with remaining completely sedentary for long periods.
However, it is more accurate to say that squats support normal circulation through muscle activity rather than claiming they directly “detoxify” the body or dramatically improve lymphatic function.
Can This Correct Pelvic Misalignment?
This claim needs some caution.
A sumo squat can strengthen the muscles around the hips, pelvis, and trunk, and better strength and control may improve how stable you feel during movement.
But the idea that one exercise can simply “realign” the pelvis is too simplistic.
Pelvic position varies naturally from person to person and changes constantly during movement.
The more useful goal is:
better hip strength, better trunk control, and more comfortable movement.
Can Sumo Squats Flatten the Lower Belly?
Not directly.
A sumo squat trains the core and lower-body muscles, and regular exercise may contribute to improved body composition over time.
But fat loss cannot be targeted to one specific area by exercising that area.
Doing sumo squats does not selectively burn fat from the lower belly, thighs, or hips.
Changes in body fat depend much more on overall energy balance, nutrition, total physical activity, sleep, and long-term habits.
What sumo squats can do is strengthen the muscles underneath those areas and improve posture and muscular control.
What About “Activating Brown Fat”?
The original routine also suggests that swinging the arms activates brown fat in the upper back and therefore increases whole-body fat burning.
Brown adipose tissue does play a role in heat production and energy expenditure.
However, it is not accurate to say that a few arm swings during a squat reliably activate enough brown fat to create meaningful fat loss.
The arm movement may still be useful because it adds coordination, shoulder movement, and a small amount of extra physical demand.
That benefit is real enough without overstating the brown-fat effect.
How to Set Up the Sumo Squat
Start by standing with your feet a little wider than shoulder width.
Turn the toes slightly outward.
Your exact foot angle will depend on your hip structure and comfort.
Then bend your knees and lower your hips.
Keep the knees moving generally in the same direction as the toes.
Try not to let them collapse inward.
Keep your torso tall without excessively arching your lower back.
Gently brace your abdomen.
The goal is not to suck your stomach in as hard as possible.
Instead, think about creating mild tension around your trunk while maintaining normal breathing.
Avoid Excessive Pelvic Tucking
The original instructions repeatedly emphasize keeping the buttocks “tucked in.”
A small amount of trunk and pelvic control is useful.
But aggressively forcing the pelvis underneath you is not necessary.
During a squat, the hips need to move naturally.
Instead of trying to eliminate all pelvic motion, focus on:
- Keeping your spine comfortable
- Avoiding exaggerated lower-back arching
- Maintaining balance through the whole foot
- Keeping your knees aligned with your toes
- Lowering only as far as you can control
Start With a Gentle Inner-Thigh Stretch
Before beginning the challenge, take a wide stance.
Bend one knee slightly while keeping the opposite leg more extended.
You should feel a gentle stretch through the inner thigh.
You can place your hands lightly on your thighs for support.
Then shift to the other side.
Do not aggressively press the knee downward.
The stretch should feel mild to moderate, not painful.
Spend a few controlled breaths on each side.
Warm Up With 30 Seconds
Before the one-minute challenge, practice the basic movement for about 30 seconds.
Take the wide stance.
Bend the knees.
Lower the hips slightly.
Then gently swing the arms while maintaining the squat.
The arm swing can help make the movement feel more rhythmic and dynamic.
You do not need to squat deeply at first.
The lower you go, the more demanding the exercise becomes.
For beginners, a shallow squat is completely acceptable.
Knee and Toe Alignment Matters
One of the most important technique points is keeping the knees moving in line with the toes.
If the toes point outward but the knees collapse inward, the movement may become less stable.
Instead, gently guide the knees outward in the same general direction as the feet.
This does not mean forcing the knees as far apart as possible.
Comfortable alignment is the goal.
The One-Minute Challenge
Once you are warm, begin the main challenge.
Take your wide stance.
Bend your knees.
Lower your hips to a comfortable depth.
Brace your core gently.
Then swing your arms while maintaining the squat.
Continue for up to one minute.
If the position becomes too difficult, rise slightly higher.
You do not have to maintain the deepest squat you can tolerate.
In fact, using a shallower depth often makes it easier to maintain better form.
What You May Feel
Within the first several seconds, you may notice tension or fatigue in:
- Inner thighs
- Quadriceps
- Glutes
- Core
- Calves
- Hip muscles
This is normal muscular effort.
As the set continues, the legs may begin to burn.
That sensation usually reflects metabolite accumulation and fatigue in the working muscles.
It does not mean body fat is literally “burning” in that area.
If you feel sharp joint pain, numbness, or sudden instability, stop.
Day 1: Learn the Position
On the first day, focus almost entirely on technique.
Do not worry about depth.
Do not worry about completing the full minute.
Your priorities are:
Stable feet.
Knees aligned with toes.
Comfortable spine.
Controlled breathing.
Smooth arm movement.
If you can only do 20 or 30 seconds with good form, that is a perfectly reasonable starting point.
Day 2: Improve Control
On the second day, try to make the movement smoother.
Notice whether your knees drift inward.
Notice whether your weight moves too far onto your toes.
Try to maintain pressure through the heel, ball of the big toe, and ball of the little toe.
This creates a more stable base.
Day 3: Add a Little More Depth
If the previous two days felt comfortable, lower slightly deeper.
Do not chase depth for its own sake.
The best squat depth is the deepest position you can control comfortably without losing balance or experiencing pain.
Day 4: Notice Your Endurance
By the fourth day, some people may notice that the position feels more familiar.
You may be able to hold the stance longer before the legs fatigue.
That does not mean your body has undergone a dramatic transformation in four days.
It simply means your nervous system and muscles are becoming more accustomed to the task.
That is still meaningful progress.
Day 5: Focus on the Core
On day five, pay closer attention to trunk stability.
Avoid holding your breath.
Instead, keep mild abdominal tension while breathing steadily.
Your torso should feel supported rather than rigid.
Day 6: Make the Movement Smooth
By day six, try to eliminate unnecessary tension.
Relax the shoulders.
Keep the arms loose.
Maintain steady breathing.
Let the hips and knees do the majority of the work.
The movement should begin to feel more coordinated.
Day 7: Complete Your Best-Controlled Minute
On the final day, perform the strongest and cleanest version you can.
That may mean a full minute.
Or it may mean several shorter intervals.
Quality matters more than forcing yourself to finish.
When the challenge ends, ask yourself:
Does the stance feel easier than it did on day one?
Can you squat slightly deeper?
Do your legs fatigue less quickly?
Does your balance feel better?
Do your hips feel more comfortable?
Those are much more useful measures of progress than expecting dramatic changes in body weight or appearance after seven days.
You Do Not Have to Do It Continuously
If one uninterrupted minute is too difficult, divide it.
For example:
20 seconds of squatting
20 seconds of rest
20 seconds of squatting
Or:
30 seconds of squatting
Short rest
Another 30 seconds
You can still build strength and confidence.
There is no special physiological benefit that requires exactly 60 uninterrupted seconds.
Add Arm Swings if You Want More Movement
Once the lower-body position feels stable, add the arm swings.
Allow the arms to move freely while you maintain control through the trunk.
This adds an upper-body component and increases the overall movement demand slightly.
It can also make a static squat feel less monotonous.
If balancing becomes difficult, keep the hands on your hips or in front of your chest instead.
Who Should Be Careful?
This exercise may not be suitable for everyone.
Use extra caution if you have:
Significant knee pain
Recent hip or knee surgery
Severe arthritis
Balance problems
Unexplained hip pain
Acute lower-back pain
An injury that affects weight-bearing
If you are unsure whether a deep wide squat is appropriate for you, ask a qualified healthcare or exercise professional.
A Chair Can Make the Exercise Easier
Beginners can place a sturdy chair behind them.
Lower toward the chair as though you are going to sit down.
You do not have to fully sit.
The chair provides a reference point and an extra sense of security.
Another option is to hold a countertop, railing, or stable support.
This can be especially useful for older adults or anyone working on balance.
A One-Minute Routine Is a Starting Point
One minute of squatting is not a complete fitness program.
But that does not make it useless.
Short routines can be powerful because they remove one of the biggest barriers to exercise:
“I don’t have time.”
If one minute becomes a daily habit, it may eventually lead to five minutes.
Then ten.
Then regular strength training.
The challenge is therefore most valuable as a gateway to consistent movement.
Why Strength Matters More as We Age
Maintaining lower-body strength becomes increasingly important with age.
Strong legs and hips support:
Walking
Stair climbing
Getting out of chairs
Balance
Daily independence
Recreational activity
Reduced frailty risk
Strength training also helps preserve muscle mass, which tends to decline gradually with age if it is not regularly challenged.
A sumo squat is only one exercise, but it can be a practical starting point.
The Most Important Goal Is Consistency
Do not worry about making the challenge perfect.
You may wobble on the first day.
You may need a shallower squat.
You may stop halfway through.
That is fine.
Tomorrow, try again.
Good movement habits are built through repetition, not perfection.
Seven days will not completely reshape your body.
But seven days can teach you a movement.
Seven days can improve confidence.
Seven days can remind your hips and legs what it feels like to work.
And most importantly, seven days can help turn movement into something you actually do rather than something you keep planning to start.
The Bottom Line
The Shiko Dachi-inspired sumo squat is a simple wide-stance exercise that challenges the thighs, glutes, hips, core, and stabilizing muscles.
Practicing it for one minute a day may help improve lower-body muscular endurance, movement confidence, and hip mobility when performed consistently and with appropriate technique.
It should not be viewed as a magical method for spot-reducing belly fat, correcting every pelvic alignment issue, or dramatically activating brown fat.
Its real value is simpler and more useful:
It gets you moving.
It challenges muscles that may not receive much attention during a sedentary day.
And it gives you an accessible way to begin building strength.
Try it for seven days.
Keep the movement comfortable.
Make each repetition slightly better than the one before.
Your most meaningful result may not be a dramatic physical transformation.
It may simply be realizing that getting stronger can start with just one minute.
Medical & Exercise Disclaimer: This article is for educational purposes only and does not replace individualized medical, physiotherapy, or exercise advice. Stop the exercise if you experience sharp pain, dizziness, numbness, or unusual symptoms. People with joint conditions, injuries, balance problems, recent surgery, or significant medical conditions should consult an appropriate healthcare professional before beginning a new exercise routine.
This article is for general education and does not replace individualized care from a qualified health professional. Seek appropriate advice for persistent, severe, or concerning symptoms.
Read the full medical disclaimer