Floor sitting hip mobility exercises can help restore movement variety that modern chair-based living often removes from daily life.Modern life asks surprisingly little of our hips.
We sit in chairs. We drive. We work at desks. We eat at tables. We relax on sofas. We move from one elevated surface to another, often spending years without regularly sitting, kneeling, squatting, or resting close to the floor.
Then one day, something falls to the ground.
You bend down to pick it up, and what should be a simple human movement suddenly feels like a negotiation with your hips, knees, and lower back.
Or perhaps you have been walking around for hours, finally sit down, and someone immediately says, “Ready to go?”
Your body has already retired.
The good news is that stiffness does not necessarily mean your hips have permanently lost their ability to move. In many cases, your body simply has not been visiting certain positions often enough.
That is the idea behind this Primal Hip Reset.
Instead of forcing yourself into extreme stretches, the routine gradually reintroduces several positions humans have used for generations: floor sitting, hip rotation, kneeling, 90/90 sitting, supported squatting, and gentle pelvic movement.
The goal is simple:
Give your hips more opportunities to move in directions that ordinary chair sitting rarely requires.
Why Floor Sitting Can Feel So Different
For much of human history, people did not spend most of the day in modern chairs.
People squatted, knelt, crossed their legs, sat directly on the ground, shifted between positions, and repeatedly moved down to and back up from the floor.
Modern chairs are convenient, but convenience can reduce movement variety.
A chair typically keeps the hips within a relatively narrow range. The hips remain flexed, the knees stay bent, and the legs often point straight ahead for long periods.
There is nothing inherently harmful about sitting in a chair.
The problem is spending hour after hour in almost exactly the same position while rarely asking the hips to rotate, abduct, extend, or move through their available range.
Over time, unfamiliar positions can begin to feel increasingly difficult.
Deep gluteal muscles, the muscles surrounding the hip joint, the inner thighs, and other tissues may feel stiff simply because they are not regularly exposed to varied movement.
Floor sitting changes that environment.
Depending on the position, your hips may need to internally rotate, externally rotate, open sideways, flex more deeply, or stabilize the pelvis differently.
Your glutes and inner thighs experience different lengths and loads.
Your trunk also has to participate.
This does not literally “reshape” your pelvis in a few minutes. A better way to understand the process is that repeated, comfortable exposure may gradually improve your tolerance, coordination, and confidence in ranges of motion that have become unfamiliar.
Your body is remembering options it has not been using very often.
Mobility Is Not About Forcing Yourself Deeper
One of the biggest mistakes people make with mobility training is assuming that more discomfort means more progress.
It does not.
You do not need to push yourself into an impressive yoga pose.
You do not need to force your knees toward the floor.
You do not need to wrestle with your hips until you question every decision that brought you to this moment.
Sit where your body allows you to sit.
Use one cushion.
Use two.
Build a small throne if that is what your hips need today.
Change sides. Lean slightly backward. Adjust your feet. Move around.
The important idea is not perfection.
It is exposure.
Spend a little more time in different positions and allow your nervous system, muscles, and joints to gradually become familiar with them.
You can sit on the floor while reading, drinking tea, talking with family, watching television, or doing something else that does not require a chair.
Mobility practice does not always have to feel like a workout.
Sometimes it can simply become part of the way you live.
The Primal Hip Reset Routine
Move slowly through the following sequence.
Nothing should cause sharp pain, pinching inside the hip joint, numbness, or worsening joint pain.
Use cushions whenever needed.
1. Gentle Knee Swings
Begin seated on the floor with your knees bent and feet positioned comfortably in front of you.
Bring the knees relatively close together.
Now allow both knees to move gently from side to side.
Do not force the movement.
Imagine your legs moving like windshield wipers.
Let the hips rotate naturally as the knees travel from one direction to the other.
This simple movement begins introducing internal and external hip rotation without requiring a deep stretch.
Move slowly enough that your breathing remains relaxed.
The purpose is not to reach the floor immediately.
The purpose is to remind the hips that rotation exists.
2. Relaxed Side-Sitting
Allow both knees to move toward one side and rest as comfortably as possible.
Place your hands behind you if you need additional support.
You may lean backward slightly.
If sitting directly on the floor causes excessive tension, place a cushion underneath your hips.
At first, this position may feel completely unnatural.
You might wonder why anyone would voluntarily sit this way.
Give it time.
Once your body becomes more familiar with low sitting positions, some of them can become surprisingly comfortable.
Traditional cultures around the world have long used variations of kneeling, squatting, cross-legged sitting, and side-sitting during meals, conversation, work, and rest.
Stay relaxed.
Then switch sides.
The two sides may feel completely different.
That is normal.
Mobility is rarely perfectly symmetrical.
3. Deeper Knee Drop
Return to the bent-knee position.
Now allow the knees to travel farther toward the floor.
Again, the knees do not have to touch the ground.
If there is a large gap between your legs and the floor, place cushions underneath them for support.
Move only within the range you can control comfortably.
You may feel areas around the outer hips, inner thighs, or buttocks beginning to work or lengthen.
Do not tense your shoulders.
Do not hold your breath.
Do not overthink the movement.
Let the hips explore.
4. One Leg Extended
Move into a position with one bent leg resting toward the floor while the opposite leg extends away from the body.
Sit as upright as you comfortably can.
If your pelvis immediately rolls backward or you feel trapped in the position, sit on a cushion.
This small elevation can make an enormous difference.
Now stay here and breathe.
Many people instinctively tense their faces and hold their breath when they encounter an unfamiliar stretch.
Check yourself.
Are your shoulders climbing toward your ears?
Are your eyebrows fighting each other?
Is your jaw clenched?
Relax.
Take a slow breath in.
Then exhale gradually.
You may notice the position feels slightly easier as unnecessary muscular tension decreases.
Do not chase depth.
Let depth come to you.
After spending some time on one side, switch to the other.
5. The 90/90 Hip Position
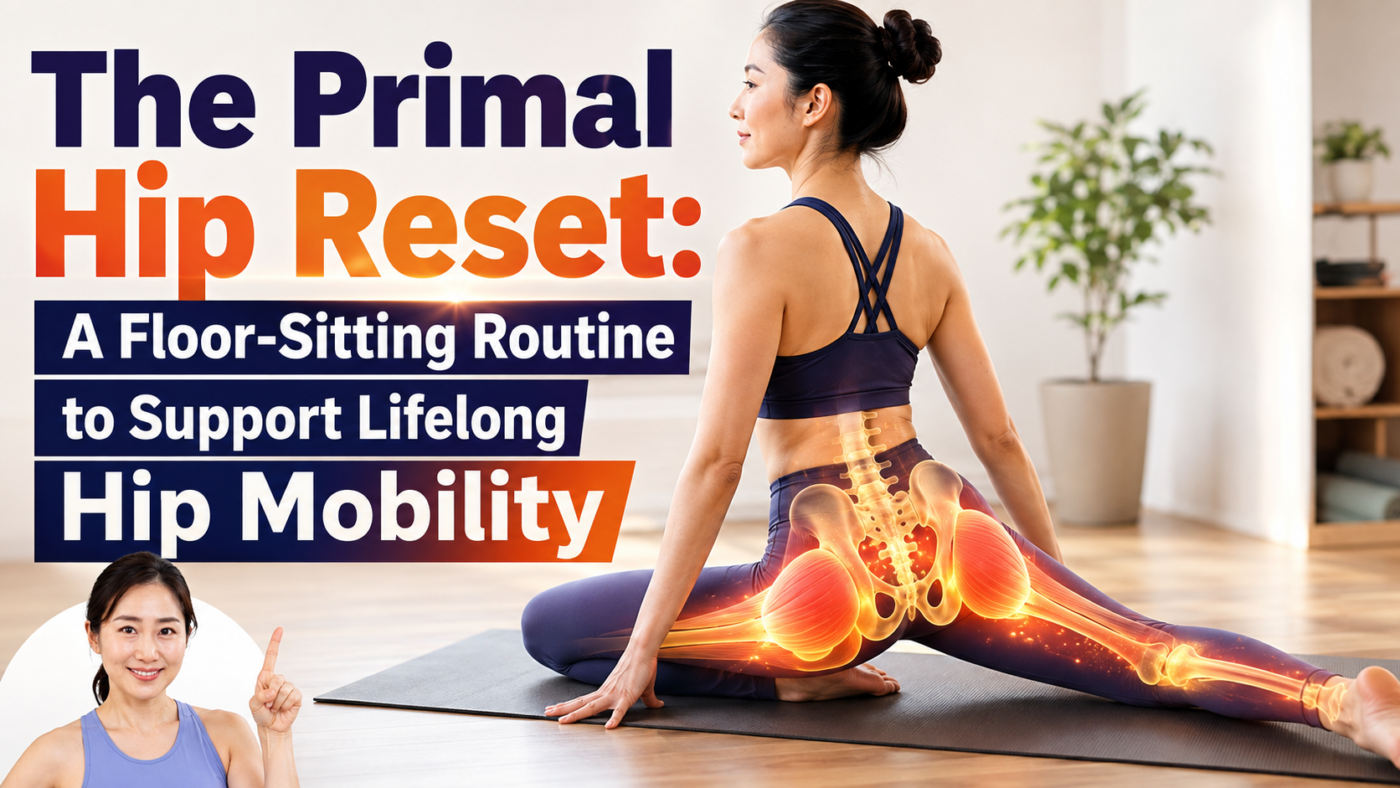
The 90/90 position is one of the most useful floor-sitting variations for exploring hip rotation.
Sit with one leg positioned in front of your body and the other positioned beside or slightly behind you, with both knees bent approximately 90 degrees.
The exact angles do not have to be perfect.
Sit tall.
If your hips are far from the floor or your torso immediately collapses to one side, place one or more cushions underneath your pelvis.
Use as many as necessary.
There is no prize for suffering closer to the floor.
Explore the Front Hip
Place your hands gently around the front knee or on the floor for support.
Without forcing the knee downward, allow yourself to settle into the position.
You may feel a deep stretch around the gluteal region or outer hip.
Keep breathing.
Think about lengthening upward through your spine rather than trying to push aggressively downward.
Add a Gentle Rotation
Place one hand near the opposite knee and slowly rotate your torso.
The movement may begin in the hips, but you may also feel your side body, back, and waist participating.
That is not surprising.
The hips do not work in isolation.
Pelvic position, spinal rotation, rib movement, and hip mobility are interconnected during real-world movement.
Return slowly to center.
Then perform the same sequence on the opposite side.
If your face has developed a strange expression, breathe.
Smile.
Pretend the entire routine was your idea.
After working through both sides, ordinary chair sitting may suddenly feel like first class.
6. Comfortable Cross-Legged Sitting and Pelvic Circles
Move into a comfortable cross-legged or loosely folded-leg position.
If sitting this way feels impossible, elevate your hips.
One cushion may be enough.
Two may be better.
Three is still completely acceptable.
Your goal is to create a position in which you can move rather than a position in which you simply endure discomfort.
Once comfortable, begin making slow circles with your pelvis and torso.
Move slightly forward as you inhale.
Travel around the side.
Move backward as you exhale.
Continue around the other side.
Think of drawing a smooth circle with your trunk.
After several repetitions, reverse direction.
This movement gently combines motion through the hips, pelvis, lumbar spine, and trunk.
You may feel stiffness gradually decreasing as your body becomes warmer and more comfortable with the pattern.
Sometimes these movements are described as “massaging the organs” or “massaging belly fat.” That language should not be interpreted literally.
Pelvic circles do not selectively reduce abdominal fat or physically massage internal organs in a medically meaningful way.
What they can do is provide gentle trunk and pelvic movement, encourage relaxed breathing, and make the hips and lower back feel less rigid.
That is already valuable.
7. Seiza: Traditional Japanese Kneeling
Next comes Seiza, a traditional Japanese kneeling posture.
Kneel with your lower legs beneath you and gently sit toward your heels.
For someone accustomed to floor sitting, this may feel natural.
For someone who has spent decades almost exclusively in chairs, it may feel very different.
Again, cushions are your friends.
If your knees, ankles, or thighs feel overly compressed, place a cushion or folded blanket between your hips and heels.
Use enough elevation to make the position manageable.
There is no benefit to forcing deep knee flexion through pain.
Once settled, begin gently moving your pelvis.
Move the abdomen and pelvis slightly forward as you inhale.
Move slightly backward as you exhale.
Continue slowly.
Coordinate your breathing with the movement.
This creates gentle movement around the pelvis, lower back, and sacral region.
Some traditional practices associate this area with energetic concepts such as the “root chakra.” Those ideas belong to spiritual traditions rather than established anatomy.
From a physical perspective, the movement can be understood more simply: you are coordinating breathing, pelvic motion, trunk control, and the muscles around the lower abdomen and pelvic floor.
If comfortable, you may gently engage the pelvic floor during part of the movement.
Think of a subtle internal lift rather than a maximal squeeze.
Then relax fully.
8. The Supported Resting Squat
Now move into a resting squat.
Place your feet roughly shoulder-width apart or slightly wider and lower your hips toward the floor.
Your exact foot position depends on your anatomy.
Some people naturally point their toes slightly outward.
Others are comfortable with their feet more forward.
Do not force your body into someone else’s squat.
If you cannot comfortably squat low, use support.
Place a cushion, yoga block, low stool, or other stable support underneath your hips.
You can also place your back against a wall, sofa, or sturdy surface.
This often makes the position dramatically easier because you no longer have to balance your entire body over your feet.
What If Your Heels Lift?
A heel-raised squat is not a failure.
Ankle mobility, hip anatomy, limb proportions, balance, and experience all influence squat depth.
If necessary, place a stable folded towel, wedge, or appropriate support underneath the heels.
Do not worry about immediately reproducing someone else’s deep squat.
Use the version your body can control.
Add Gentle Side-to-Side Movement
Once you are comfortable, bring your elbows toward the inside of your thighs if your position allows it.
Gently shift from side to side.
Keep the movement small.
Feel the hips adapting to different angles.
If you have more comfortable mobility, experiment with bringing your chest slightly closer toward one thigh and then the other.
This creates a different stretch through the hips, inner thighs, and lower back.
There should still be no sharp pain.
9. Finish With Long Legs and Relaxed Ankles
When you are ready to finish, sit down and stretch your legs out in front of you.
Let the hips relax.
Move your ankles.
Point and flex the feet.
Circle them gently.
Shake out unnecessary tension.
Your hips survived.
More importantly, you have just exposed your body to a collection of positions that modern life often removes from the day.
Why These Positions May Feel Easier Over Time
Mobility is more than simply “stretching a muscle.”
Your experience of a position is influenced by joint structure, muscle strength, nervous-system tolerance, movement familiarity, coordination, balance, and the confidence your brain has in that range.
A position you have not used in years may initially feel threatening or awkward.
That does not automatically mean something is damaged.
With gradual, repeated exposure, many people become more comfortable.
The nervous system becomes familiar with the movement.
The surrounding muscles learn to generate and control force at different angles.
Balance improves.
You stop fighting the position.
Movement begins to feel more natural.
This is one reason consistency usually matters more than forcing a dramatic stretch once a week.
Five comfortable minutes performed regularly may be far more useful than one heroic mobility session that leaves you sore enough to avoid the floor for the next ten days.
Your Hips Do Not Need a Perfect Routine
You do not need to complete every position every day.
You do not need exactly 20 repetitions.
You do not need a complicated mobility program.
One of the simplest strategies is simply to create more movement variety throughout your normal day.
Instead of spending an entire evening on the sofa, spend ten minutes sitting on a cushion on the floor.
Change your leg position every few minutes.
Move from cross-legged sitting into side-sitting.
Try a supported 90/90 position.
Kneel briefly.
Practice a comfortable squat while holding a stable surface.
Then return to your chair.
The floor itself becomes a mobility environment.
Every time you change positions, your hips encounter another combination of flexion, rotation, abduction, and muscular control.
That variety is the real point.
Do Not Confuse Discomfort With Progress
A moderate stretching sensation can be normal.
Sharp pain is not the goal.
Stop or change the position if you experience:
Sharp or catching pain inside the hip.
Increasing knee pain.
Numbness or tingling.
A feeling that a joint is unstable.
Pain that continues to worsen after the session.
If you have significant hip or knee arthritis, a recent joint injury, joint replacement, previous surgery, or another condition that limits floor movement, individualized advice from a qualified healthcare professional may be appropriate before attempting deep kneeling or squatting.
Mobility practice should expand your options, not punish your joints.
You May Be Capable of More Than You Think
There is an important lesson hidden inside these simple positions.
As we get older or spend more years living a sedentary lifestyle, it becomes easy to quietly reduce our expectations of the body.
We stop squatting.
We stop sitting on the ground.
We avoid getting down on our knees.
We stop rotating deeply through the hips.
Eventually we try one of those movements again, discover that it feels difficult, and conclude:
“I guess I just can’t do that anymore.”
But difficulty is not always the same thing as inability.
Sometimes the body has simply been underused in that particular direction.
You do not have to regain everything today.
You do not need to become extraordinarily flexible.
You do not have to move exactly as you did twenty years ago.
You simply need to keep giving your body opportunities.
A few minutes today.
A slightly easier position next week.
A deeper but still comfortable squat months from now.
A floor position that once felt impossible gradually becoming a normal place to sit.
Little by little, movement can become easier to live with.
And that is a meaningful goal.
The purpose of mobility is not to perform impressive stretches.
It is to maintain enough freedom of movement that everyday life continues to feel accessible.
To reach the floor.
To stand up again.
To squat.
To kneel.
To rotate.
To play.
To move without treating every low position like a battle.
Your body may still be capable of much more than you have been asking from it.
Give it the chance to show you.
Frequently Asked Questions
Is sitting on the floor actually good for hip mobility?
Floor sitting naturally exposes the hips to positions that are uncommon during ordinary chair sitting, including greater hip rotation and different combinations of flexion and abduction. It can therefore be a useful way to introduce more movement variety. It is not necessary for everyone, however, and the position should always be adapted to individual comfort and joint health.
How long should I sit on the floor?
There is no universal requirement. Beginners may start with only a few minutes and change positions frequently. Comfort and consistency are more important than trying to remain in one posture for a long time.
What if I cannot perform the 90/90 position?
Elevate your hips with cushions and reduce the angles of your knees. You do not need perfect 90-degree positions to benefit from practicing comfortable hip rotation.
Should my knees touch the floor?
No. Never force the knees downward. Your anatomy and current mobility determine where the legs naturally rest.
What if I cannot keep my heels down during a squat?
Use support. Lean against a wall, hold a stable object, or use an appropriate heel elevation. Heel position is influenced by ankle mobility, anatomy, proportions, balance, and practice.
Can these exercises reshape my pelvis?
Not in the literal way that some mobility claims imply. What may change with practice is your movement tolerance, muscle control, coordination, flexibility, and ability to access different hip positions.
Can pelvic circles reduce belly fat?
No exercise can selectively “massage away” abdominal fat. Fat loss is primarily influenced by overall energy balance and other metabolic and lifestyle factors. Pelvic circles are better viewed as gentle mobility and movement exercises for the trunk, hips, and lower back.
How often can I practice?
Gentle floor mobility can often be practiced regularly if it remains comfortable. Short, frequent exposure is usually preferable to forcing long, painful stretching sessions.
Final Thought
Your hips may not need another extreme flexibility challenge.
They may simply need more chances to move.
Sit lower.
Change positions.
Rotate.
Kneel.
Squat with support.
Breathe.
Give your body time.
You are not trying to recreate the past.
You are rebuilding movement options for the years ahead.
And sometimes the most effective mobility practice is not a complicated exercise at all.
It is simply remembering how to spend a little more time on the floor.
Medical Disclaimer
This article is for educational and informational purposes only and is not medical advice, diagnosis, or treatment. Individual anatomy, mobility, injuries, and medical conditions vary. Stop any movement that causes sharp pain, numbness, instability, or worsening symptoms. People with significant hip, knee, ankle, or spinal conditions, recent surgery, joint replacements, or other relevant medical concerns should consult an appropriately qualified healthcare professional before beginning a new mobility routine.
This article is for general education and does not replace individualized care from a qualified health professional. Seek appropriate advice for persistent, severe, or concerning symptoms.
Read the full medical disclaimer